Jacki Cammidge is a Certified Horticulturist specializing in frugal, low-input gardening and propagation, with lifelong hands-on experience and years as a wholesale nursery head propagator.
- Frill Free Horticulture
- Seed Planting
Seed Planting
Growing Your Own Vegetables From Seeds
Starting your own plants from seed is wreathed in mystery and myth. There are many sources that claim that to successfully grow vegetables from seed you need a degree in botany, years of experience and perfect conditions.

The only part that's true is the part about perfect conditions - however, this is also the only part you have control over.
Seeds are designed to stay dormant until the right time; this means that they won't start to sprout or germinate until they get three things; moisture, warmth and light.
 Read the package; there is a lot of information on them such as number of days until transplanting or harvest, how deep to plant the seeds and so on
Some seeds don't require light to germinate, but the young seedlings need it if they are to stay healthy.
The worst thing you can do is to
get the seeds to germinate (with the other two requirements) and then
try to grow them where there isn't enough light.
The intensity of the light is only one factor; the length of the time that they get light is also important - this is called 'photoperiod'.
Without both the brightness and the length, the seedlings will stretch for the light, and become spindly, weak seedlings that will always struggle, and probably won't produce the harvest you're after.
Starting them too early is wasted time, seed and soil mix. Don't get too eager. If you absolutely have to start something now, grow some microgreens. They are fast, giving a harvest in 30 days, and will satisfy that need for some green sprouts.
Leave the tomatoes, peppers, beans and other things that like warm conditions until spring truly arrives, and direct seed them into that lovely warm bed with a glass window over them.
 Using shallow trays to start seedlings in serves several purposes...
I always use shallow trays filled to within a few millimeters of the top with soil for starting broccoli, cabbage and other greens. If the tray or container is too deep, they won't make very good top growth, but the roots will try to find the bottom of the pot.
This is a problem when you go to transplant them because you'll have to remove over half of the roots - this causes the plant to go into shock, and possibly stunt the growth.
The other reason for using shallow flats is that it uses a lot less soil mix - always use sterilized soil for seeding such as my favorite seed starting soil. It's not worth the heartache of trying to grow them in unpasteurized mix, with all the diseases, weeds and other problems that will come along with it.
Sterilize your flats after each crop with boiling water if you can - this prevents mold and mildew and other pathogens from wintering over.
Make shallow grooves in the soil or media across the flat.
Use a short stick pressed into it to make a good seedbed.
Sprinkle the seeds very thinly in pinches.
Spray gently with a spray bottle - don't overdo it with the water as you can wash the seeds out of the groove.
Most seeds don't need to be covered, just let the moisture do the work for you.
If necessary, with slow germinating seeds, you may want to use turkey grit or other small gravel to prevent the growth of moss or algae as the seeds germinate.
 Covering the seeded flats with clear plastic domes gives the seeds the other factor; moisture.
I use clear plastic domes to protect the seedlings from mice, and also to create a little micro climate of warmth and consistent moisture.
It prevents the soil from drying out too fast.
It's important to shake off the excess condensation, which can help prevent damping off and other fungal diseases from taking hold.
The domes are only on until the seeds are germinated, then they are replace with...
 Mouse damage prevention is ongoing...
Bird cages!
Don't take the risk of letting mice or other hungry critters take all the fun out of growing your own food.
Prevent the damage right at the start by making it as difficult as possible for the vermin. I collect bird cages, and this is the time to use them.
Until the seedlings are big enough to go outside, they are protected under the cages.
They get all the light they need, and it's easy to water through, but no mice can get through the bars.
Lacking bird cages, upside down plastic flats are another choice - keep in mind that they don't allow the same amount of light in.
 A nice batch of compost tea collected from snow melt off the green roof
Speaking of water, I collect the snowmelt off the green roof that was renovated with compost last year - it's ready to use compost tea.
I fill the watering can and put it in the greenhouse to warm up - there is no point in shocking the seedlings with cold water. Tempered, or warmed up to room temperature is best.
Water in the afternoon, so the leaves have a chance to dry off before night fall to prevent 'damping off' which is usually fatal for seedlings.
Sprinkle the soil with cinnamon to stop it from spreading, and give the tiny plants more ventilation - a small fan works well, or open the lids of the domes or the door to the cold frame for a few hours. Remember to close it up again!
What do you do with the soil, once your seeds are germinated and the seedlings safely transplanted? Mix it in with some potting soil and add it to your hanging baskets, of course!


You might like these
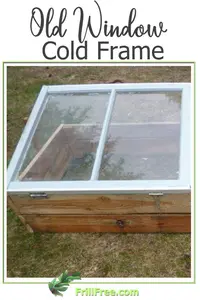
Old Window Cold Frame - make a protective place for seedlings
Make a protective place for seedlings and more with an Old Window Cold Frame...
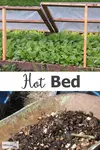
Hot Bed - how to start your seedlings early
A Hot Bed gives you a jump on the season for starting vegetable seeds; learn how to use compost for bottom heat and get started early...
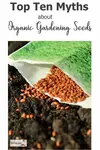
Top Ten Myths about Organic Garden Seeds - the real dirt
The Top Ten Myths about Organic Garden Seeds; get the real dirt about some nonsense and misconceptions...

Sustainable Gardening e-Book
Click here to find out more about this e-Book and build your own LUSH Organic Garden!
 Jacki Cammidge
AUTHOR BIO
Jacki Cammidge is a Certified Horticulturist who helps gardeners grow more with less through low-input, budget-friendly gardening and propagation. She has gardened her whole life, served as head propagator at a wholesale nursery, and handled thousands of rose and juniper cuttings.
Readers can find her at Frill Free on Facebook and Pinterest. Her frill-free approach was forged in northern BC, where horse manure, leaves, salvaged sawdust, and a deer-tested raised bed built her garden from scratch.


