- Homesteading
- Garden Shed Building Plan
- Shed Pier Foundation
Shed Pier Foundation
Quick and Simple Foundation Strategy for Sheds
For a small building or shed, the pier foundation is perfect - quick to do, and takes the least amount of embodied energy.
What is 'embodied energy'? That's the amount of energy that it takes to produce the items you use.
So for this pier foundation, there is concrete, but it's a much smaller amount than, say, a perimeter foundation where the entire perimeter is formed and poured.
If you order too much cement (which is hard to avoid), make sure you have a use for the excess, like
these foundation blocks made from plastic nursery pots with a piece of
rebar in the middle; This technique is what we used on the Circle Of Thyme Chapel rebuild.
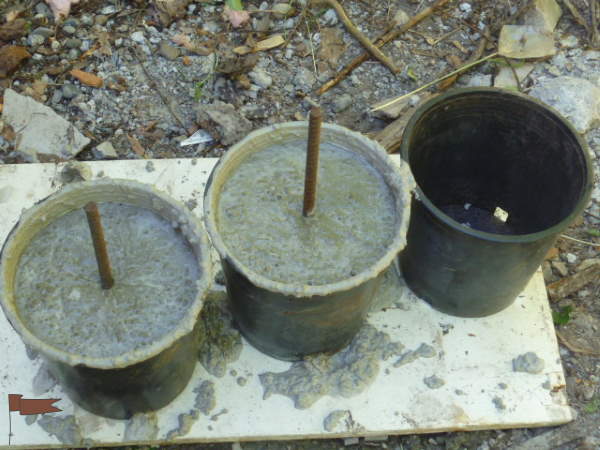 Extra cement has to go somewhere, so make some footings to use on other projects
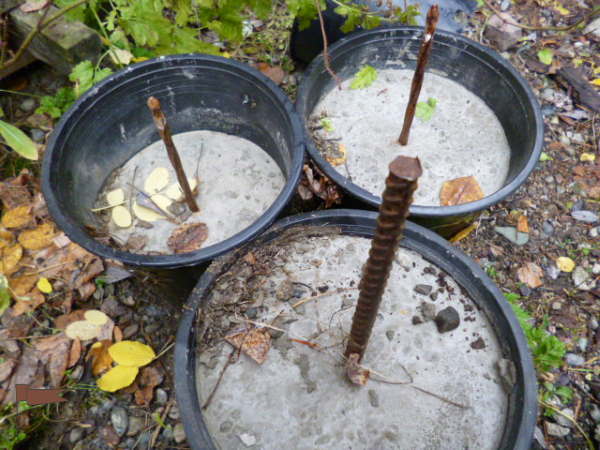 Cement in pots with rebar or spikes
The spikes or rebar are inserted into the cement when it's still wet. We use these for various projects; trellises, archways, gates and so on.
The bottom of a sturdy upright (either a pole or a 4x4, most often) is drilled into with a drill bit that is larger than the diameter of the spike or rebar, and then it slides over the spike, after the whole pot is sunk into the ground.
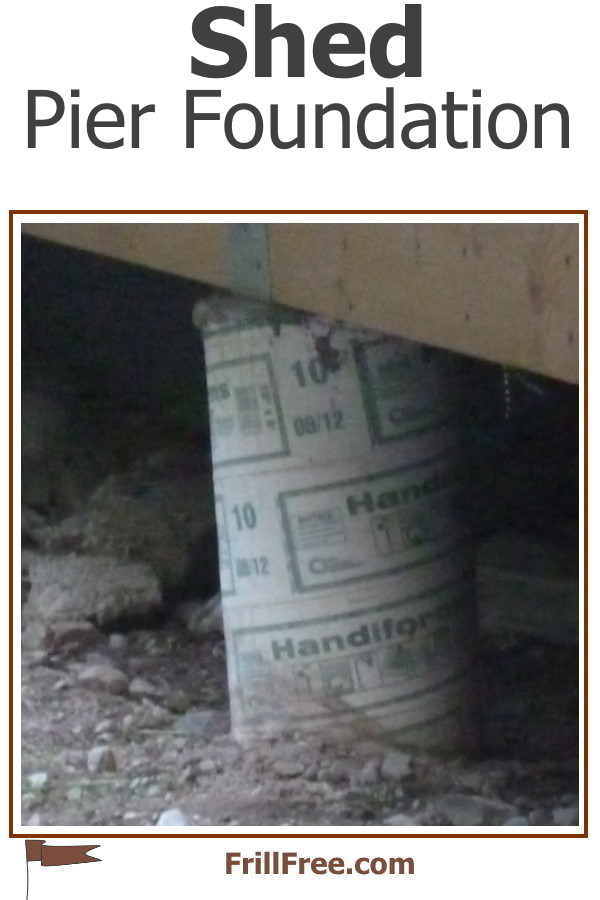
There are two types of pier foundation; footings made from Sonatube (heavy duty cardboard tubes), either with or without a 'Big Foot' at the bottom.
This entails digging a hole, then making sure that the footings are level and plumb.
The second type is to use specially designed concrete blocks that are formed to hold a 4x4" post. These are called 'pier blocks' in my area - maybe do some research on the name they go by in yours. These sit on top of the ground.
There is also an alternate type using the same principles, with a saddle made of metal which has a post on the bottom to sit in a hole in the concrete, either poured or in a block, and the post is attached by being screwed in place.
Either type works, depending on your project.
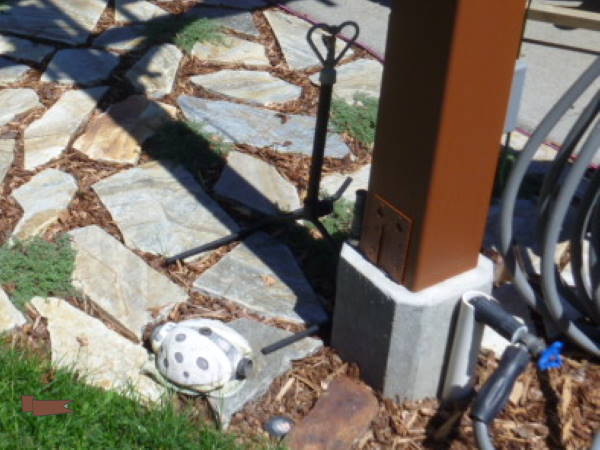 Saddle type of foundation for posts
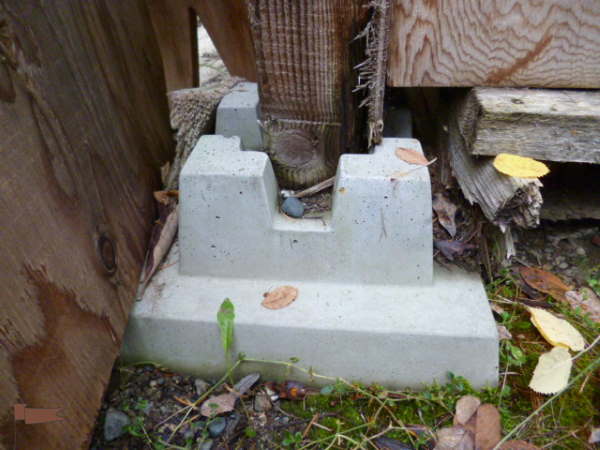 Shed Pier Foundation block - a 4x4 post fits snugly into the poured concrete block
These specially engineered blocks are designed to be used with 4x4 posts, which fit perfectly into the block.
We used these for the Livery woodshed, which needs to hold a lot of weight in the winter. We've had four feet of snow at times.
The design of the block prevents the posts from shifting.
For a lighter project, such as a woodshed or chicken pen, I would use these concrete blocks.
They're cheaper, and easy to install; they just sit on top of your prepared area - a small amount of gravel under them will make sure they don't get water under them and heave with the frost.
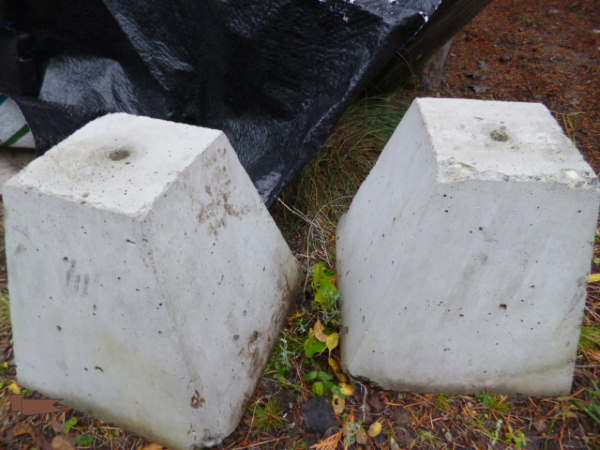 Concrete blocks with a hole molded into the center of the top. A saddle fits in these perfectly.
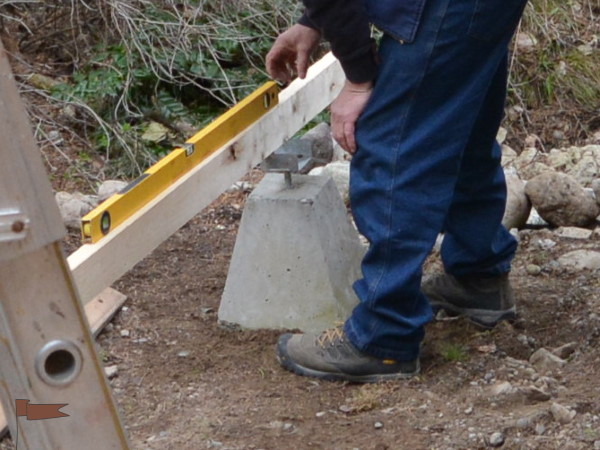 Leveling and plumbing is the first step in using these concrete blocks as a foundation - this is for the Breezeway Studio wall
The more intensive pier foundation, with the Sonotubes and Big Foots, entails a lot more disturbance to the ground (holes must be dug, preferably with a machine, or hand dug).
The Big Foots have a length of Sonotube attached to them with screws and then the whole thing is put into the prepared holes, then back filled. With the large 'foot' at the bottom, it's almost impossible for the foundation to shift.
When using the Big Foots, the building inspector has to sign off on them prior to back filling and the concrete being poured.
This is the method we used for Pearls Place - see information on the foundation here.
For a home or addition to one, a deck, or a large shed or shop, I would recommend the more intensive method.
This will hold a lot more weight without shifting. I've seen foundations where people tried to cheap out, only to find the whole structure put at risk from the foundation failing due to frost. Don't be this person. It can be a costly mistake, and not worth the trouble.
