- Homesteading
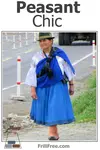
- Peasant Chic
- One Piece Blanket Vest
One Piece Blanket Vest
Patchwork and funky
Everyone on the homestead values their vest. They're easy to grab on the way out the door to go and feed chickens or get some firewood. This is one that is super easy to make, and it's super easy to make it unique and customized to each individual.

If you have a favorite vest, that fits you well, use that for the measurements. If you don't, use the guidelines here to measure yourself;
Measurement A is the measurement around your body at the widest part - on some people, this will be the chest, on others the hips.
This, plus five to ten inches for ease, will be the measurement of the vest. If you prefer the slimmer fit, use the smaller measurement - you can always take some off, but it's difficult to add some, so be generous.
Measurement B is from the base of your neck, down to wherever you prefer the vest to end. Some of us prefer longer vests to cover the bum, others like a bomber style that ends just below the waist.
Measurement C is the width of the shoulders, and can be either the front or the back. Use this to double check the width of the vest - before you cut it out!
The diagram below shows where all the measurements match up to the vest;
 One Piece Vest pattern diagram
Remember to add enough easement onto the measurements. This is especially important if you use any kind of fluffy fill, or, as in this example, blanket, as lining.
The more layers, the more ease you'll need.
Before you go any further, decide how the vest will close; will it have buttons and loops? A zipper? Buttons and buttonholes? No closure at all? This decision will impact how much extra fabric you'll need along the two front edges.
Another decision you need to make is if you'll put pockets on the vest. Built in welt type pockets, or patch pockets are a whole lot easier to put on while the fabric is flat (before you sew up the shoulder seams).
On the homestead, pockets of some description are invaluable; somewhere to put your phone, seed packets, or dog treats.
You also should give some thought to how the vest will be finished; will you bind the edges with bias cut fabric or tape? Or sew the vest, lining and the blanket together and turn it inside out before sewing the shoulder seams together?
Now that you've decided all these various things, time to get started.
If you have a woolen blanket, this is the perfect weight for a vest.
Keep in mind that you may be using this as your extra layer when doing activities like shoveling horse manure, cleaning and whitewashing the chicken house, or chopping wood. You won't need it to be really warm.
Use a piece of banquet paper or large newsprint for your pattern, and transfer all your measurements to it, using the diagram of the pattern as a guide.
If you want to make the vest out of patchwork, decide where and which pieces to put in various places.
The back is a perfect place to put a beautiful patchwork sampler square, building around it with other pieces for the right size for the completed vest.
Give it more room than you think, because any kind of lining or batting can take up room, shrinking the project down.
Care Of Your Blanket Vest
If you've used a wool blanket for a lining, wash the whole thing in that mode, no matter what fabrics you've used for the outside. Shrinking the wool will affect everything else, so cool water to wash, cool to rinse, as it's the change in temperature that will felt the wool.
Lay it flat to dry.
If you hang it by the door from a hook, use the armhole to suspend it, not the back of the neck, unless you sew in a loop to hang it from.
You might like these
Seamless Dolman Top - spare and simple elegance - and easy to sew
Simple and easy to sew Seamless Dolman Top - you don't need to be top of your sewing class for this one...
Peasant Chic - or, clothing for the country
Peasant Chic - or, clothing for country or gardening wear using vernacular design techniqes...
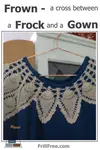
Frown - a cross between a Frock and a Gown
Build yourself a Frown, a cross between a Frock and a Gown for special occasions, everyday wear, or as night attire...


